This article contains instructions for manually configuring the Shure wireless microphones in the ITS-supported classrooms to work with the receivers located in the lecterns. The microphones should already be configured properly for each room, however, if you find that one is not, use the following instructions to reconfigure it.
Jump to:
Configuring Digital Wireless Mics for ITS Lecterns
Syncing the mic with the receiver
Digital wireless mics can be easily synced with the mic receiver on the lectern.
Steps
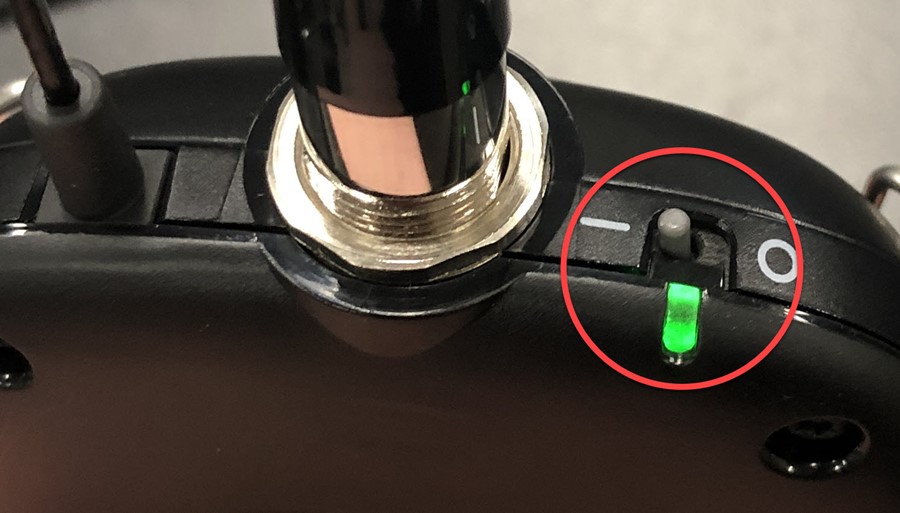
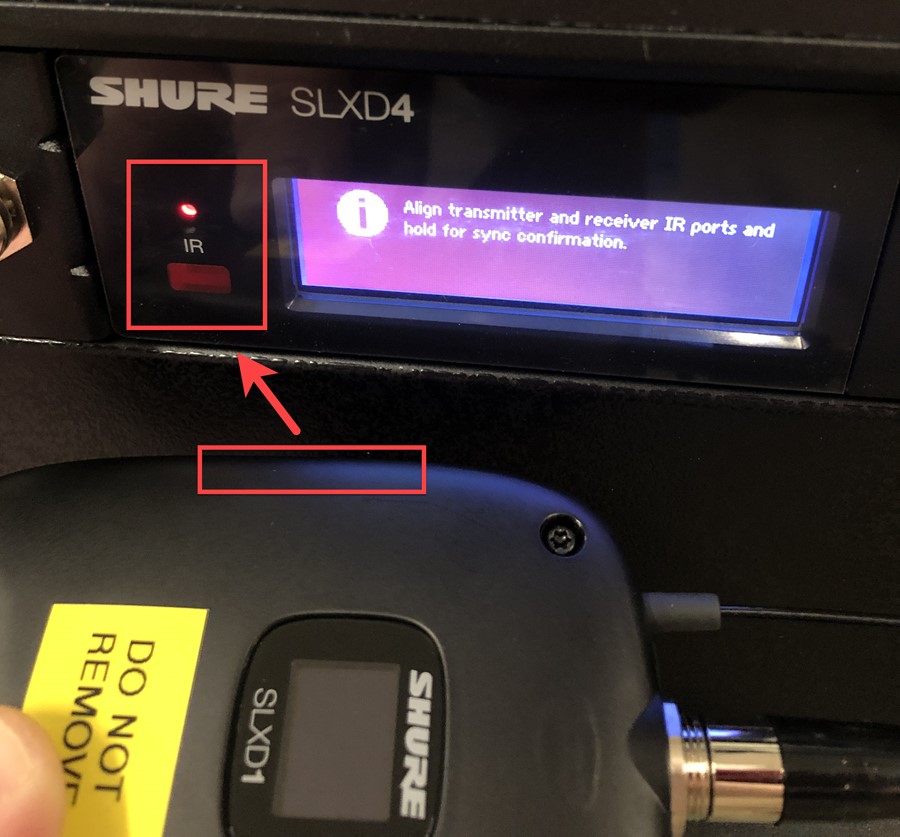
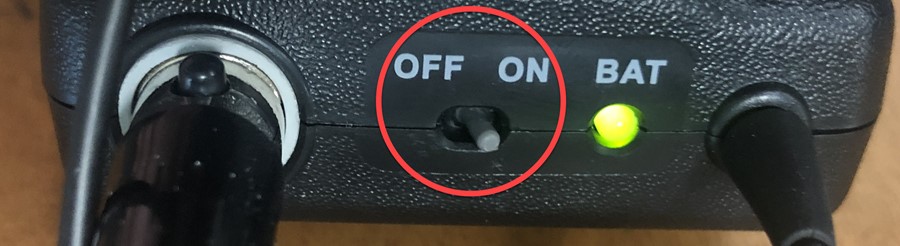
1. Power on the wireless mic belt pack. The power switch located on the top of the pack. (- on | o off)
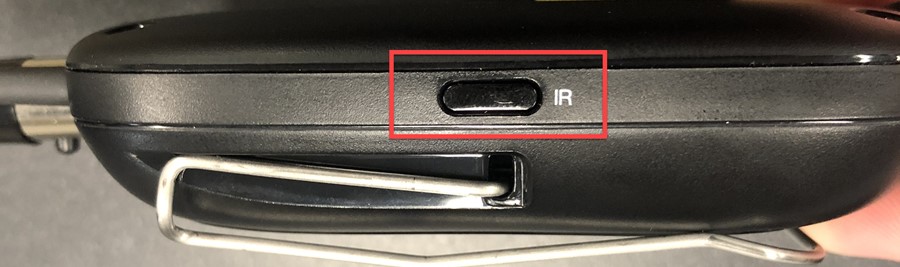
2. Locate the IR transmitter port on the left side of the belt pack.
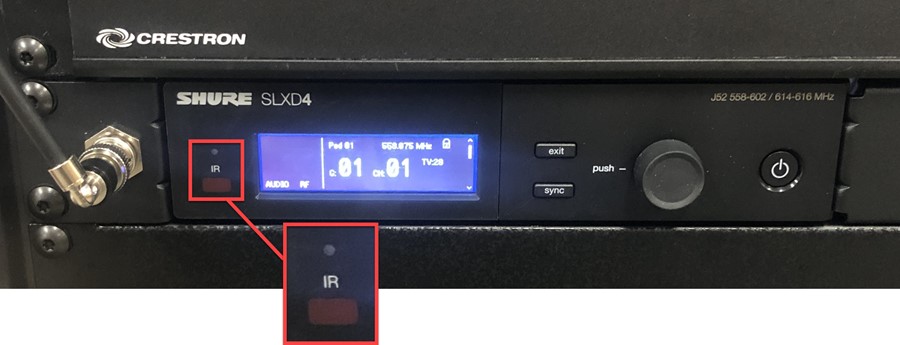
3. Locate the IR Receiver port on the POD mic receiver.
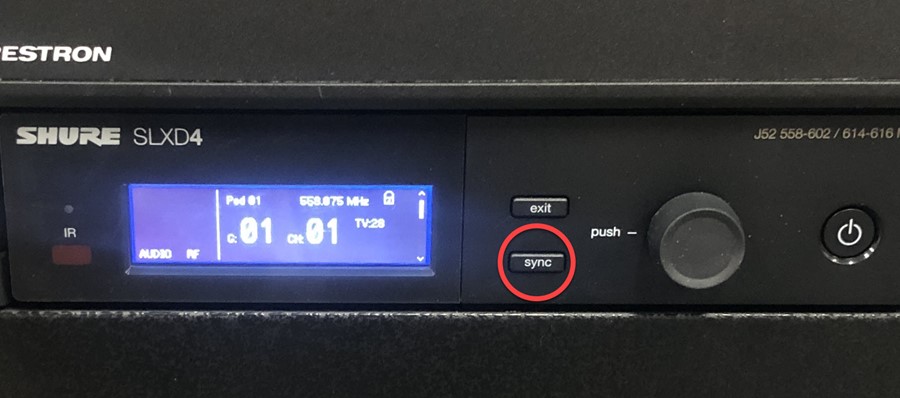
4. Press the Sync button on the lectern receiver.
5. Hold the IR transmitter port on the belt pack up to the IR port on the receiver
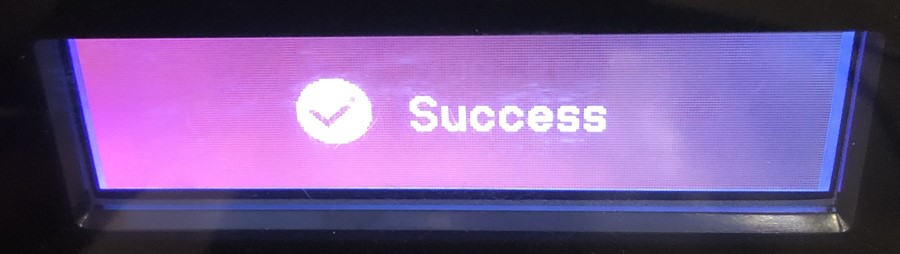
6. The receiver should display a Success message when the sync is complete.
7. The wireless mic should now be configured to work with the lectern.
Configuring Analog Wireless Mics for ITS Lecterns
Manually setting the group and channel
Analog wireless mic models need to be set so that the group and channel on the mic belt pack is set to match the receiver located on the lectern.
Steps
1. Power on the wireless mic belt pack. The power switch is located at the top of the pack.
2. Check that the group and channel match on the belt pack and the lectern receiver (located on the lower part of the lectern or on the Crestron Screen). If they do match, no further configuration is needed. If they do not, proceed to step 3.
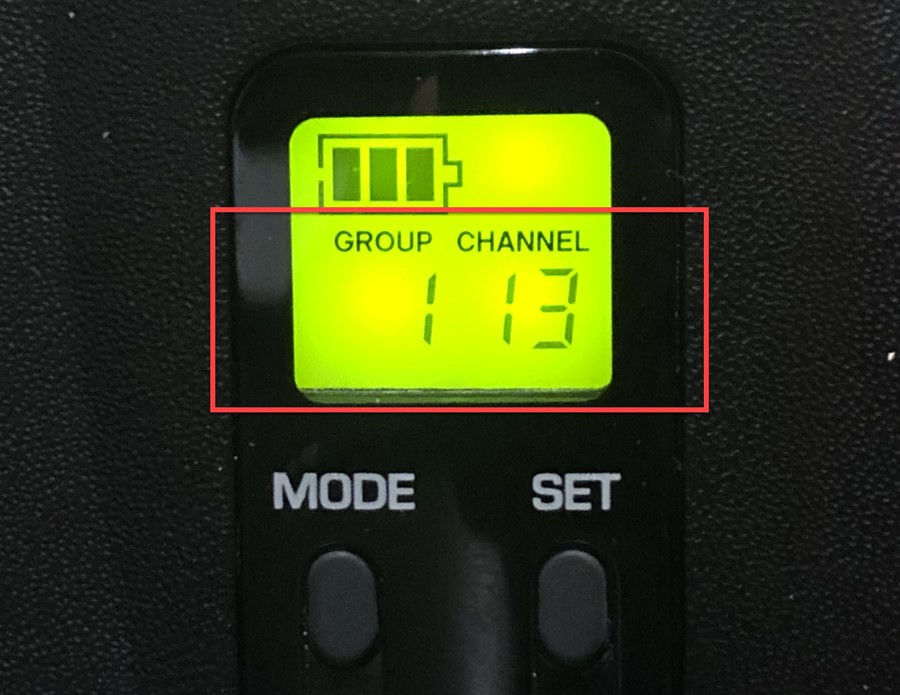
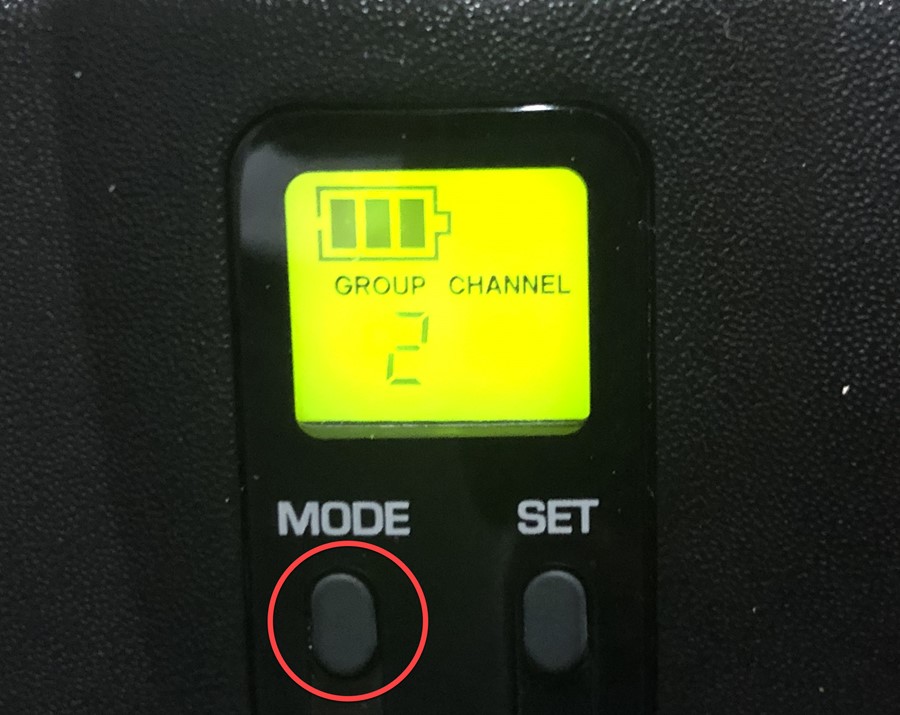
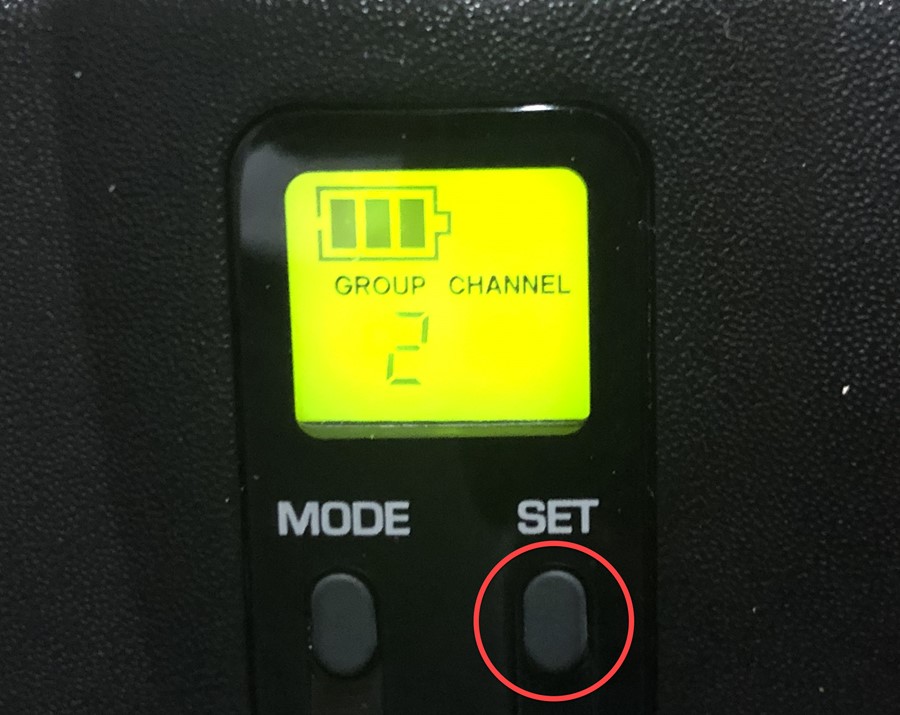
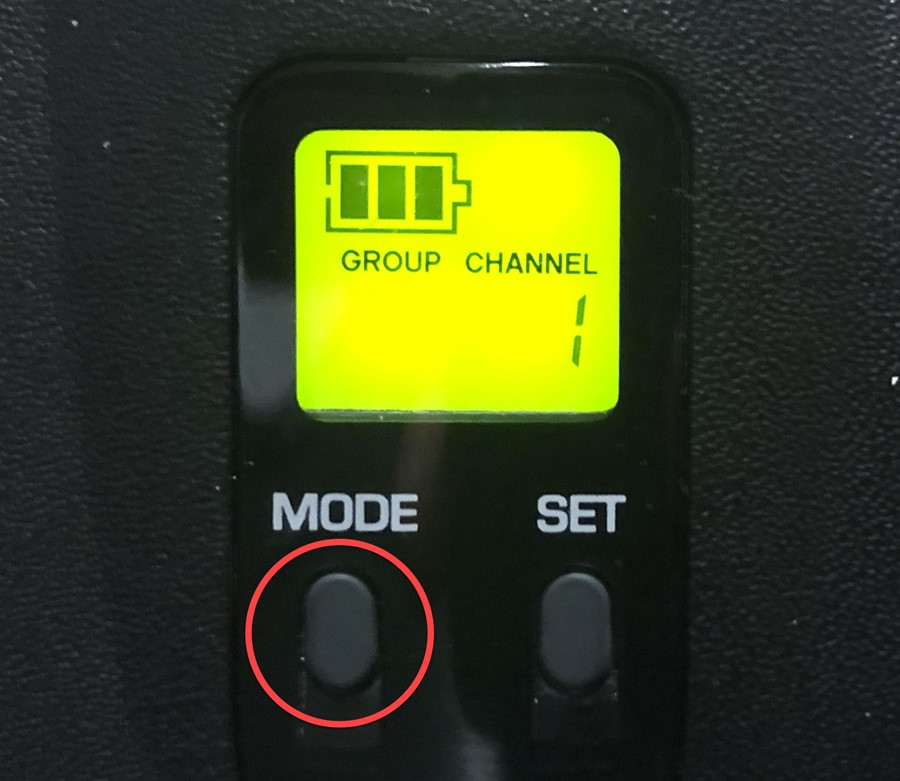
Mic belt pack group and channel display
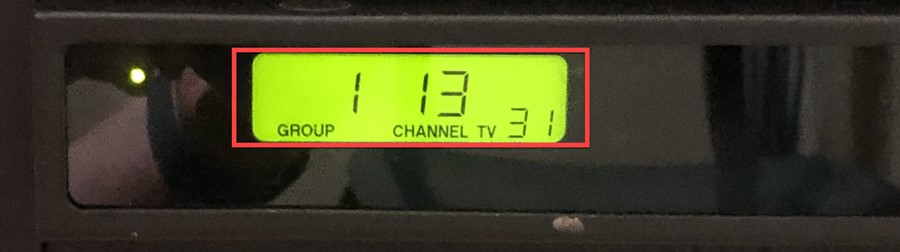
Lectern receiver group and channel display
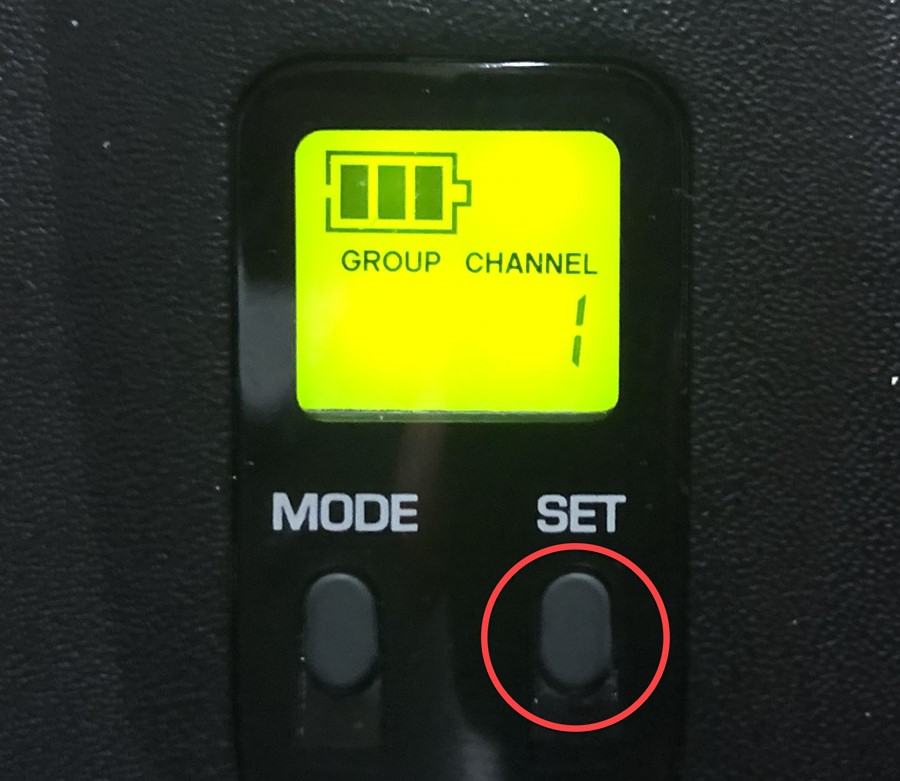
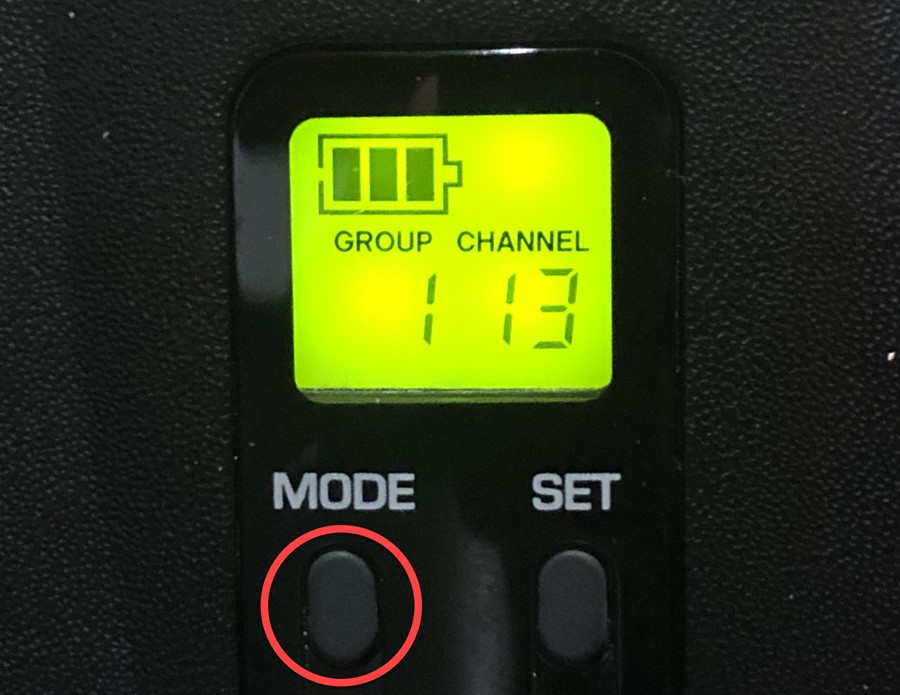
3. Press and hold the Mode button on the belt pack until only the Group number is showing.
4. Press the Set button until the Group number matches the one on the receiver.
5. Press the Mode button again; only the Channel number should be showing.
6. Press the Set button until the Channel number matches the one of the receiver.
7. Press the Mode button one more time to save the Group and Channel settings.
8. The wireless mic should now be configured to work with the lectern.
For any questions related to this article or for further assistance, please contact the ITS Service Desk.