ITS-supported classrooms with a lectern and an extensive suite of hardware are located in over 200 classrooms across the Starkville and Meridian campuses.
Equipment
Each Lectern is equipped with a Crestron-based multimedia processor with a touch panel user interface.
The touch panel user interface controls:
- Powering up the audio/video equipment
- Audio
- Specific audio/video equipment displaying on the projector
- Shutting down the equipment
The hardware equipment in all ITS-supported classroom lecterns include:
- A PC (Running Windows 10)
- A monitor
- A document camera
- A DVD - Blu-ray Player (Level 2 rooms only)
- VGA and HDMI connections, so a user can bring their laptop and connect it to the lectern. Cables are not provided.
- A lectern microphone
- A Shure analog wireless microphone receiver (only available on lecterns installed in summer of 2020 and earlier)
- A Shure digital wireless microphone receiver
Power On Sequence PDF
Lectern Power On Sequence
1. Lectern Start Up
a. Touch the Power button on the Crestron screen. The projector screen should automatically lower.
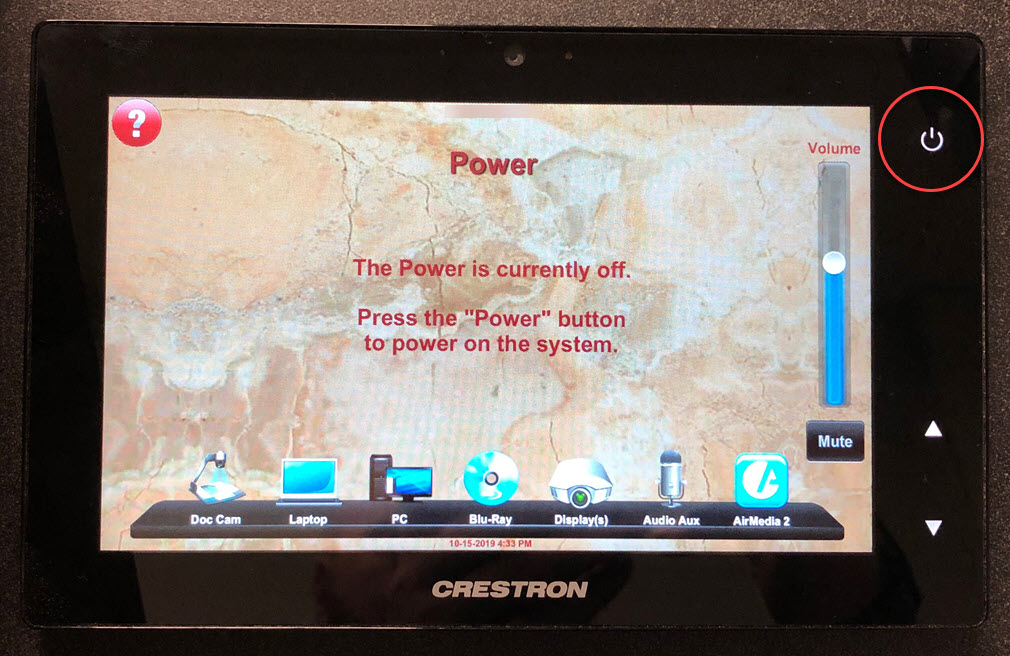
b. If using a laptop, the HDMI connection is located under the keyboard on the front panel. Touch the Laptop icon after connecting the video cable.
2. Computer Power On
a. Press the computer Power button, located on the front panel.
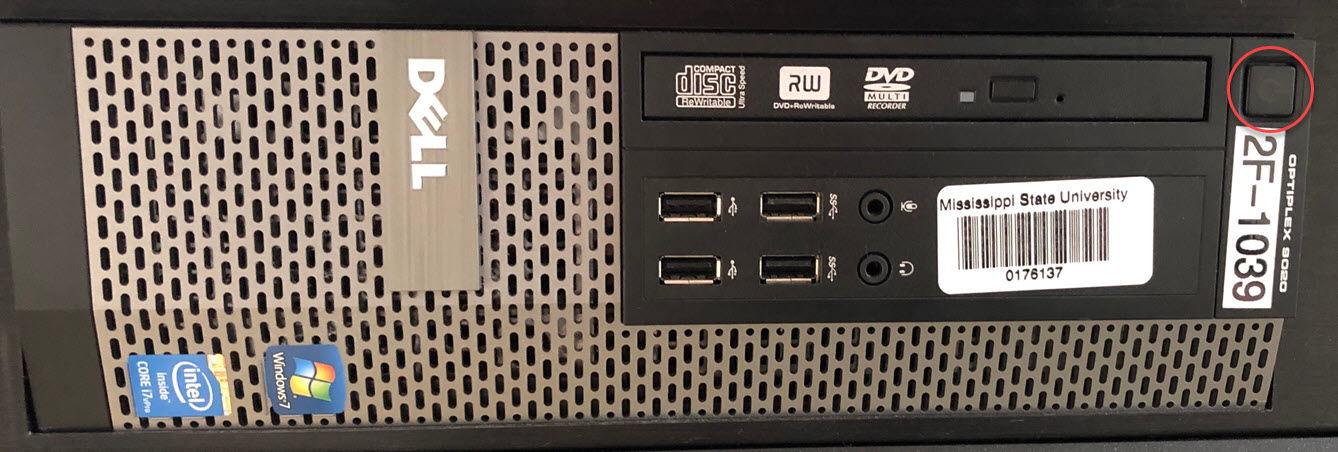
b. If the monitor does not power on, press the monitor power button.
c. Log in with your NetID and NetPassword.
d. Authenticate with Duo (Push or Passcode only).
Video: Lectern Power On Sequence
Lectern Power Off Sequence
1. Computer power down
a. Click the Windows icon.
b. Click Power, then click Shut down.
2. Lectern power down
a. Press and hold the Power button on the Crestron control panel.
Video: Lectern Power Off Sequence
View how to record lectures using the ITS supported lecterns and access additional resources