Below are instructions on how to allow/block senders in Microsoft Outlook for Windows.
Allow/Block Senders
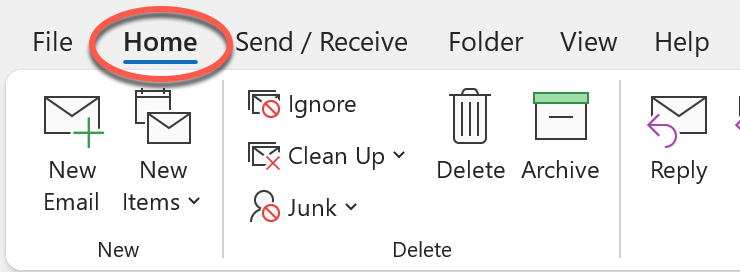
1. Open your Outlook email application and click Home.
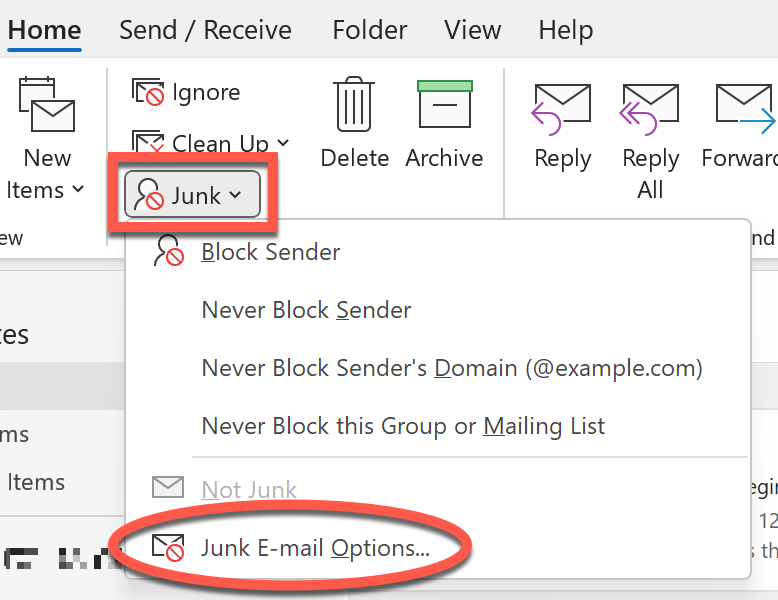
2. Click Junk, then click Junk E-mail Options....
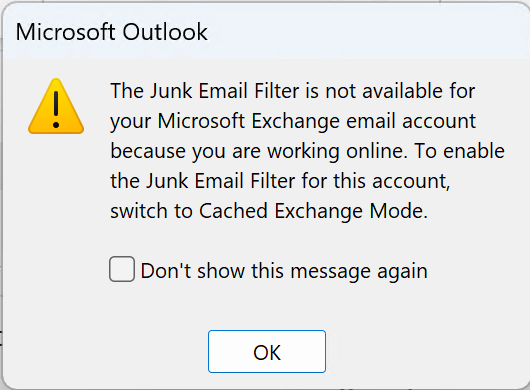
3. If you are operating Outlook in online mode then you will see the popup below. Follow the instructions in 3a-3c to enable Cached Exchange Mode.
If you don't receive this message, skip to step 4.
Enabling Cached Exchange Mode
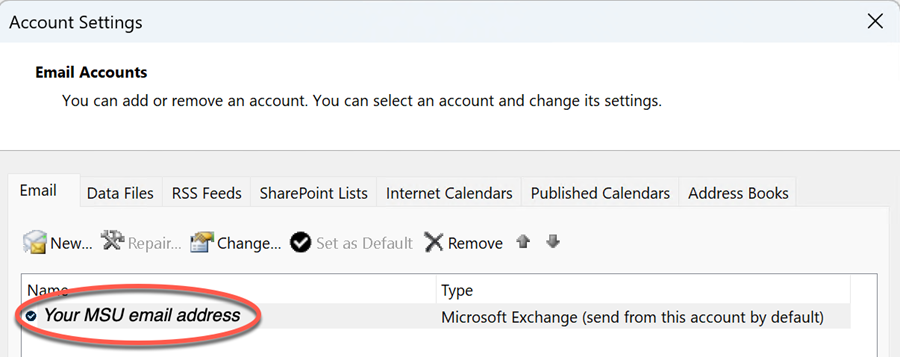
3a. Click File, click Account Settings, then click Accounts Settings in the dropdown. Double click your MSU account.
3b. Check the check box next to Use Cached Exchange Mode to download email to an Outlook data file. Use the slider to select the length of time to cache your email; the default is All. Click Next.
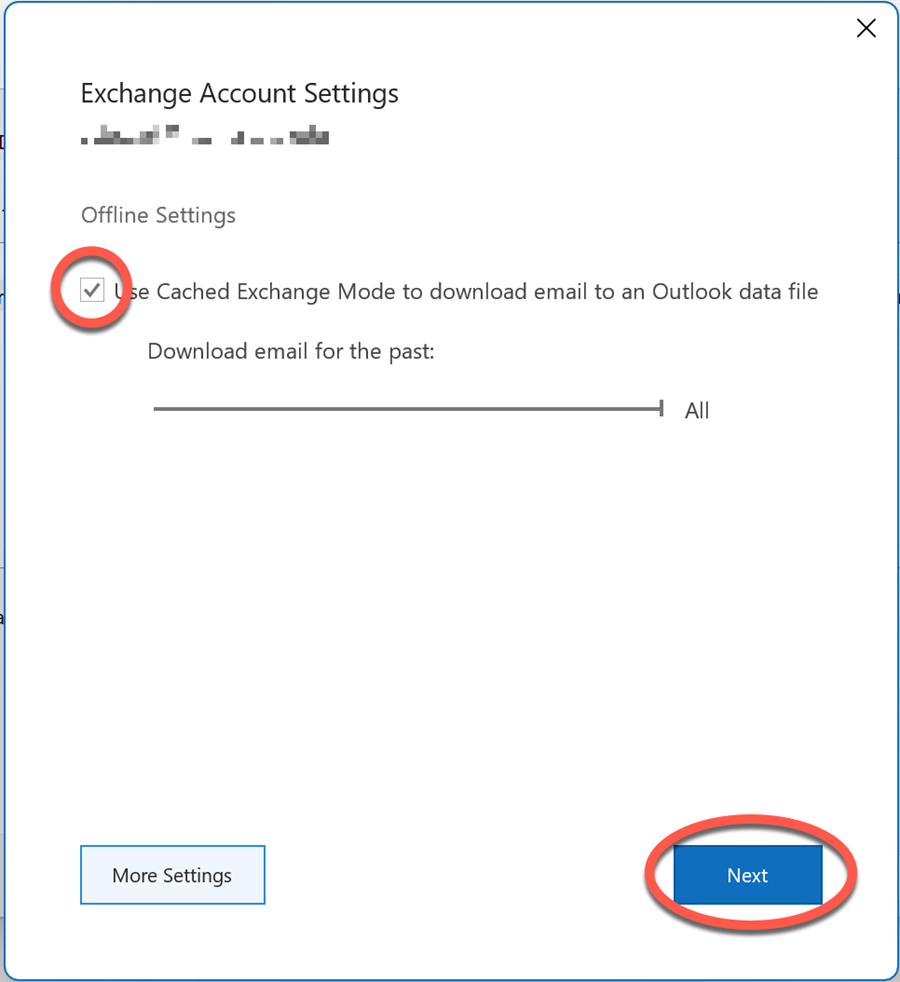
3c. Click Done, restart Outlook, when prompted, then follow steps 1-3 again to navigate back to Junk Email Options.
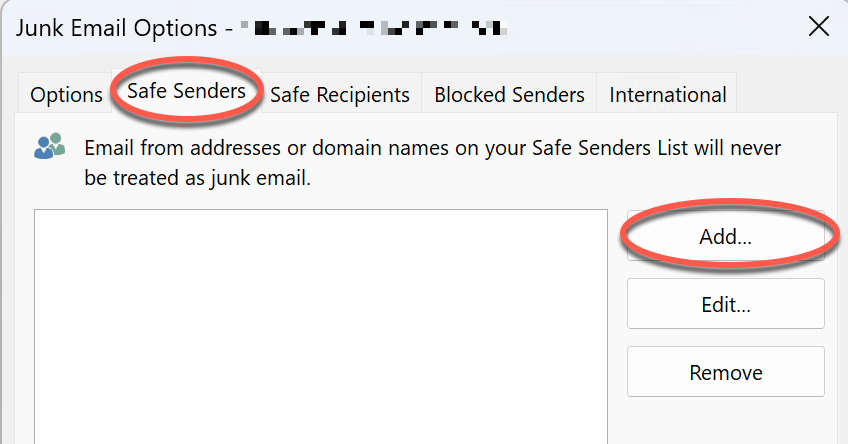
4. At the top of the Junk Email Options window are different tabs where you can allow/block senders.
To allow senders, follow steps 4a-4d for the Safe Senders tab. Otherwise, skip to step 5.
Adding Safe Senders
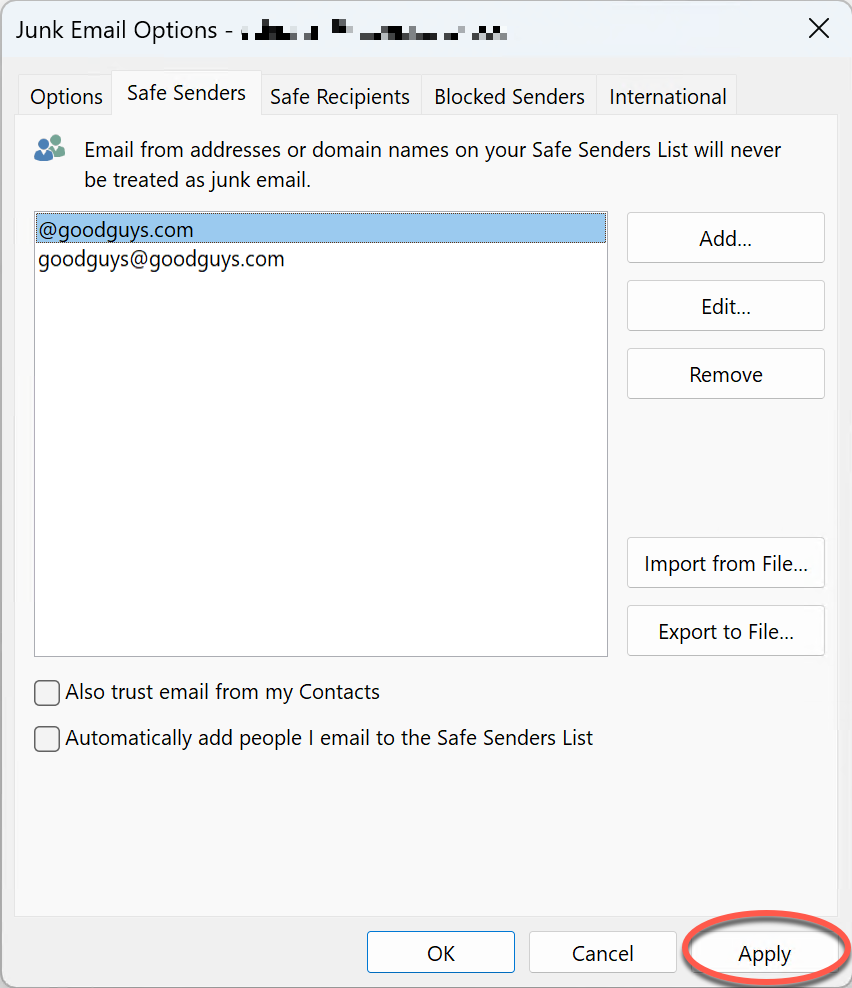
4a. Click the Safe Senders tab, then click Add....
4b. Type in the email address or the domain name of the Safe Sender. Click OK.
|
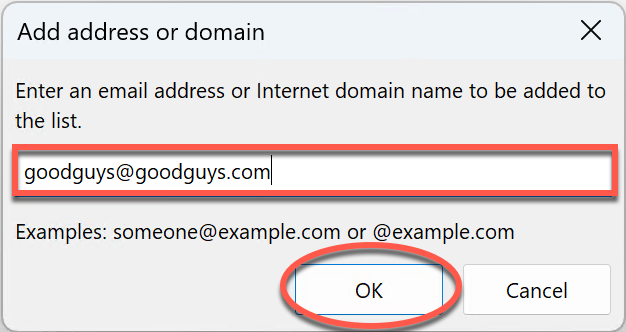
Example email address
|
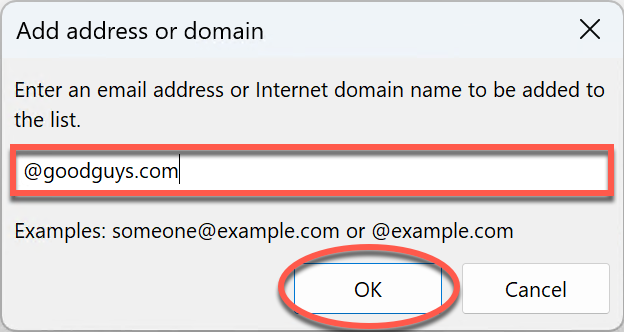
Example domain name
|
4c. Click Apply and continue to step 5 to learn how to block a sender. Otherwise, skip to step 6.
5. To block senders, follow steps 5a-5c. Otherwise, skip to step 6.
Adding Blocked Senders
5a. Click the Blocked Senders tab, then click Add....
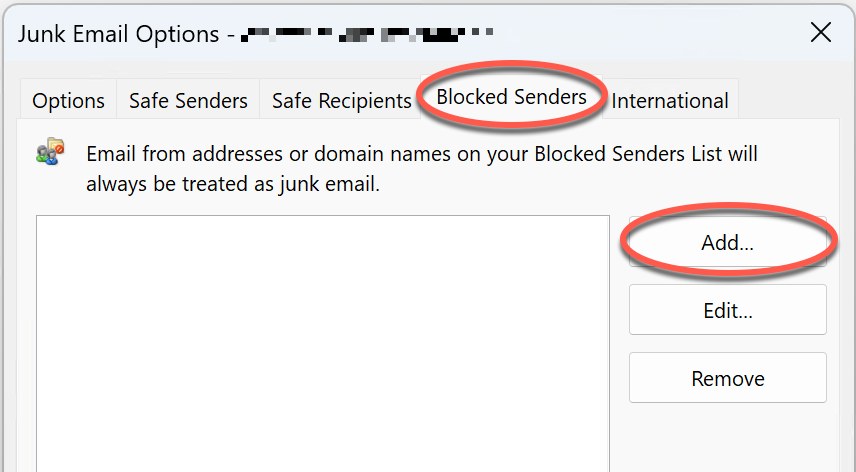
5b. Type in the email address or the domain name of the Blocked Sender. Click OK.
5c. Click Apply.
6. Click OK. You have now added the Safe and/or Blocked Sender(s).
Please visit Microsoft's webpage, Overview of the Junk E-mail Filter, if you need additional information.
If you run into any issues or need additional assistance, please submit a ticket using our Request assistance with Employee email or Request assistance with Student email services.