Video - Adobe Acrobat Sign - 5:35 min
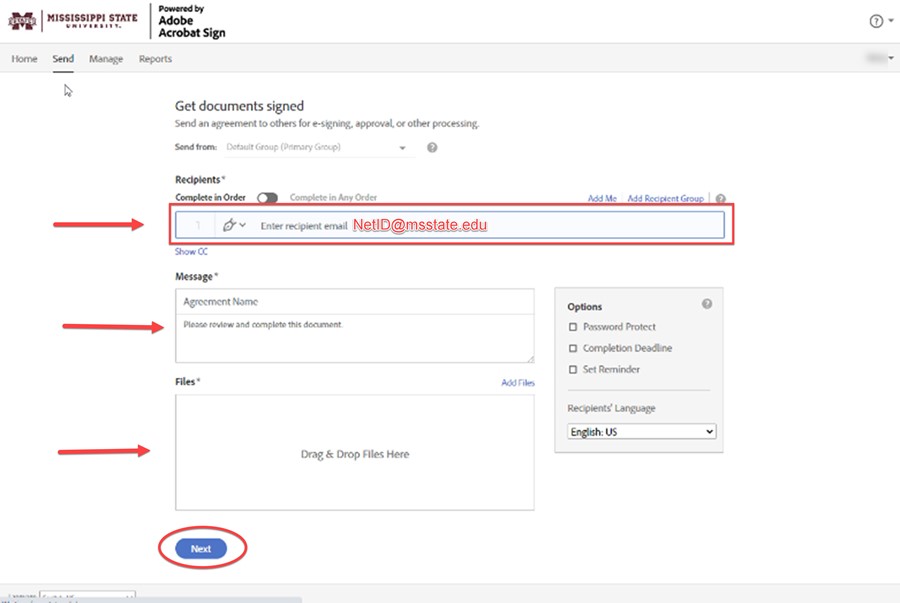
After logging into Adobe Acrobat Sign, click Send on the home page.

In the Get documents signed window, enter the NetID@msstate.edu email address of the person who needs to sign. If more than one person needs to sign, enter the other NetID@msstate.edu email addresses. If the signatures need to be completed in a certain order, make sure the Complete in Order button indicated this. Enter a message to the person(s) receiving to sign. Drag and drop or browse for the documents. Click Next.
(NOTE: Documents may be sent to emails outside of MSU. When a document is sent to someone, they do not have to have an Adobe Acrobat Sign account. They click on the link in the email to review and sign.)
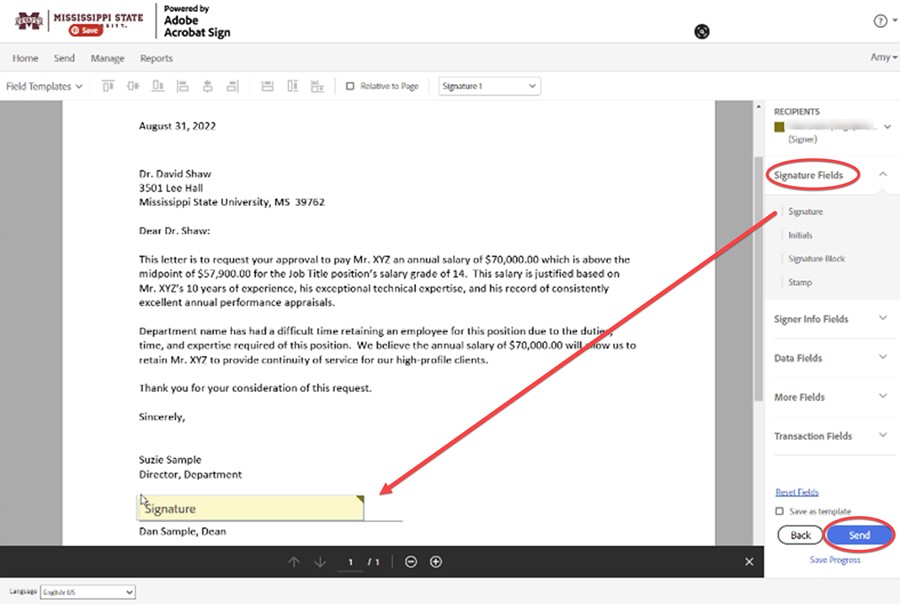
In the next window is a preview of the document. On the right, expand Signature Fields. Click, hold, and drag Signature to the place in the document where the recipient needs to sign. Click Send.
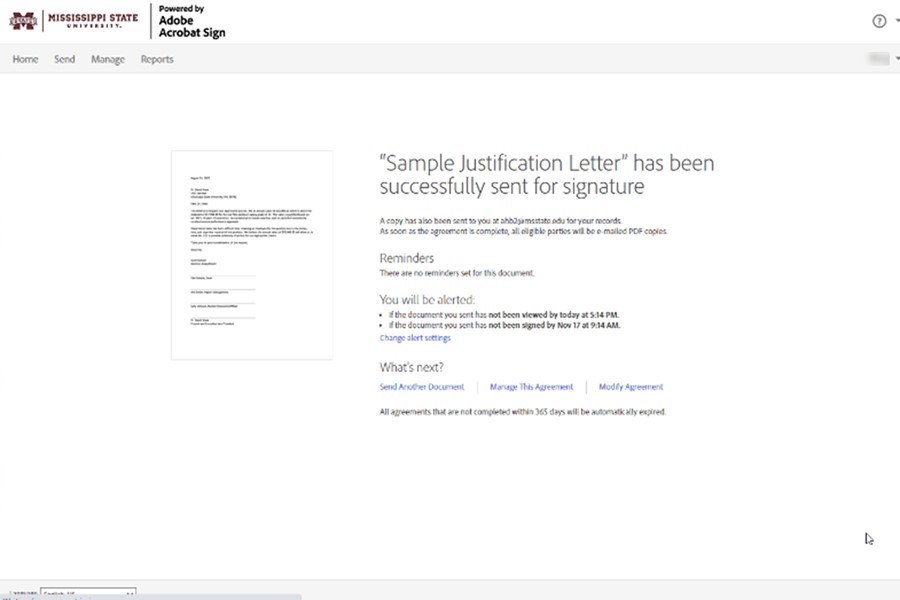
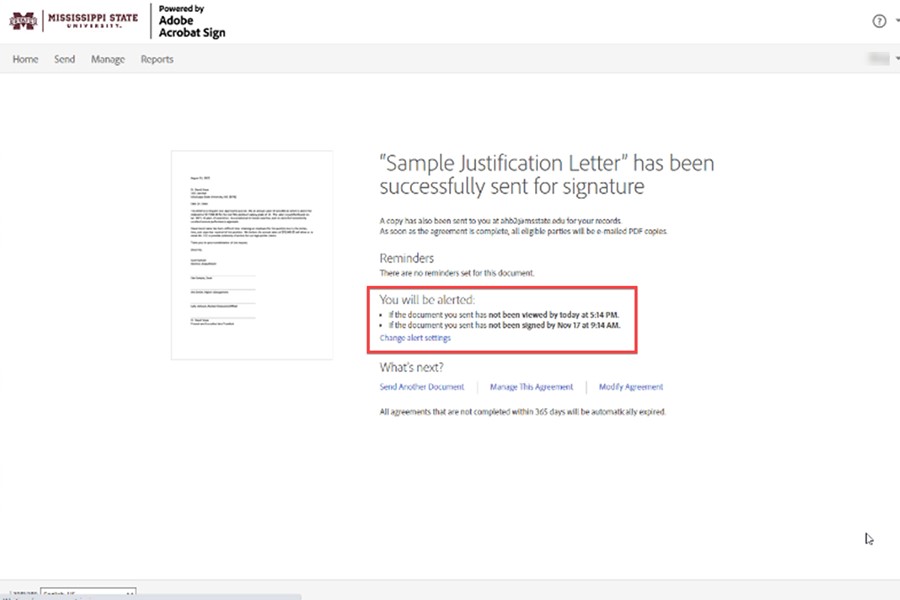
A message that the document has been sent successfully is shown. Also note that under You will be alerted if the recipient has not viewed or sent the document by a certain date.
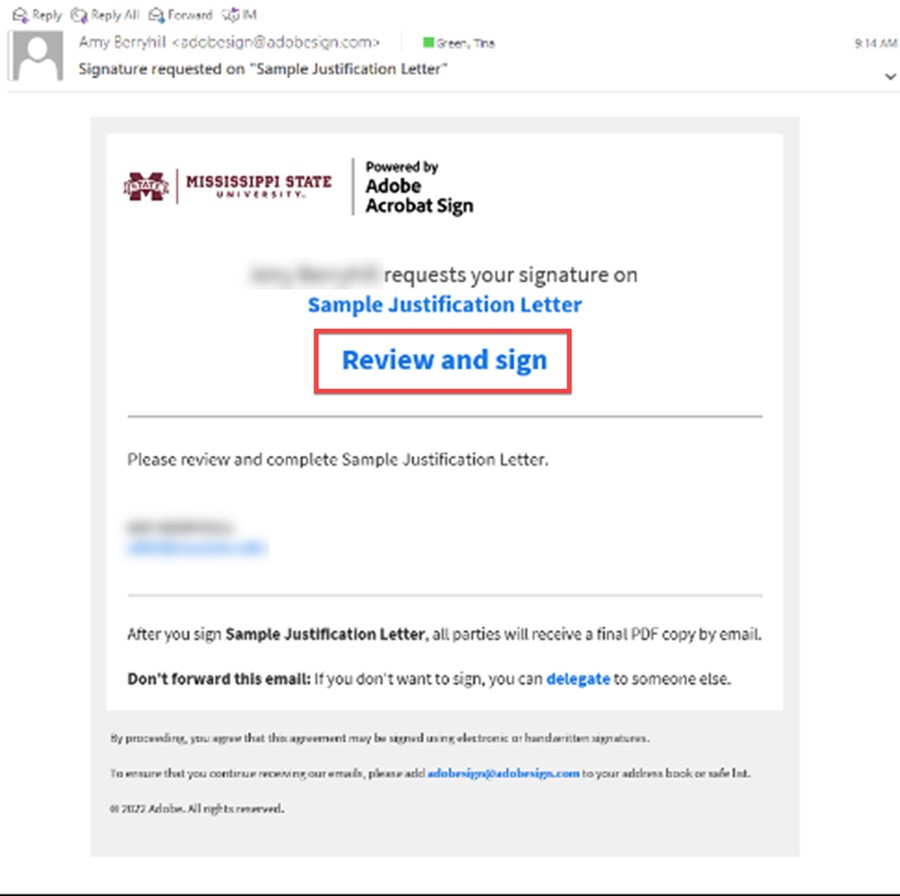
The recipient receives a message with the sender's name, the document's name, and a link to click. The link takes the sender to the document for signing.
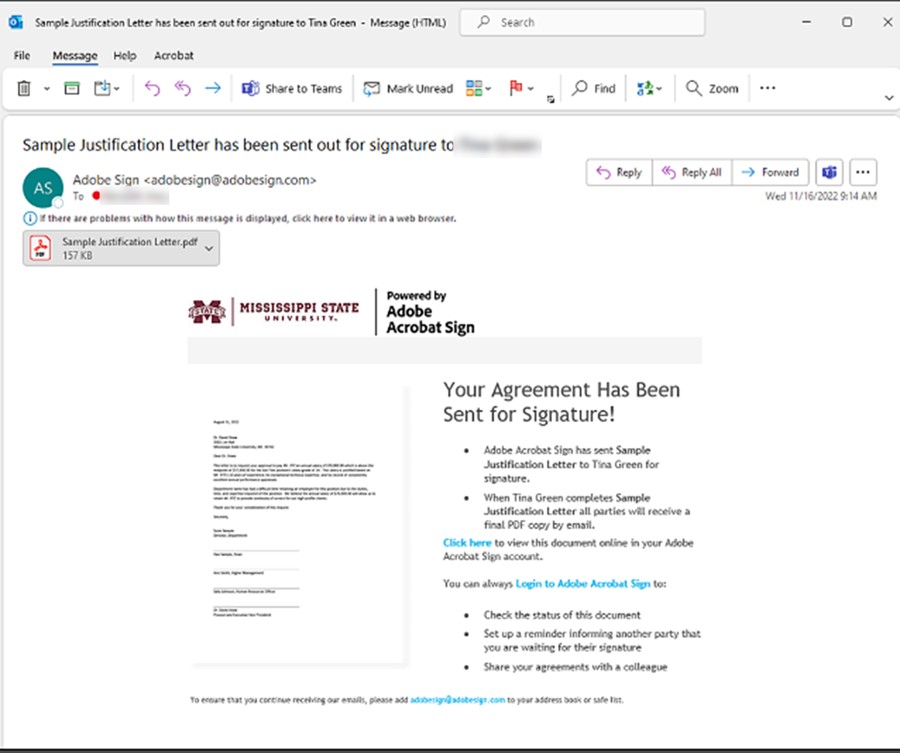
The sender also receives an email stating that the document has been sent for signature.
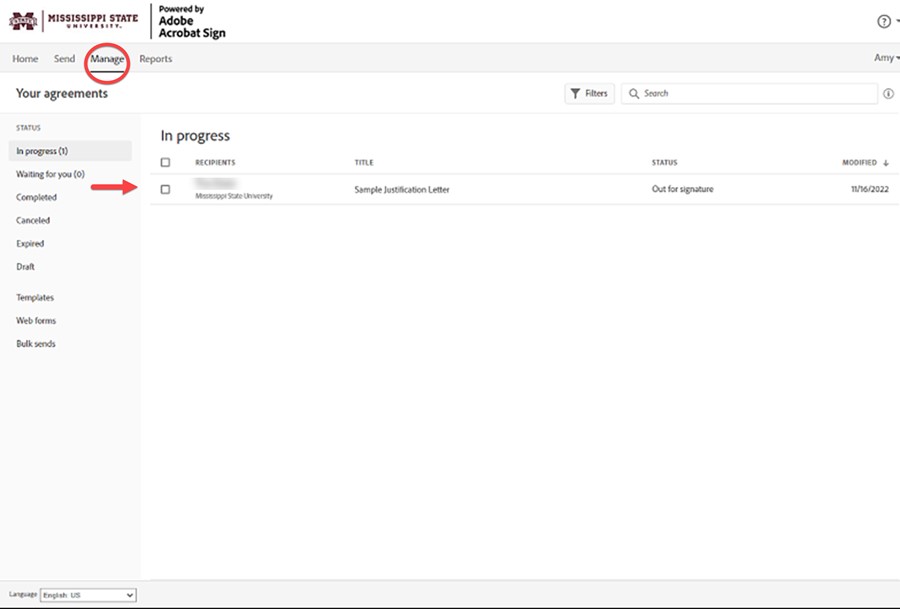
In Adobe Acrobat Sign, under the Manage tab, the document is shown as Out for signature.
When the document has been signed, the sender receives an email. There is also an attached copy of the signed document. There is also a copy of the document stored in the sender's repository in Adobe Acrobat Sign.
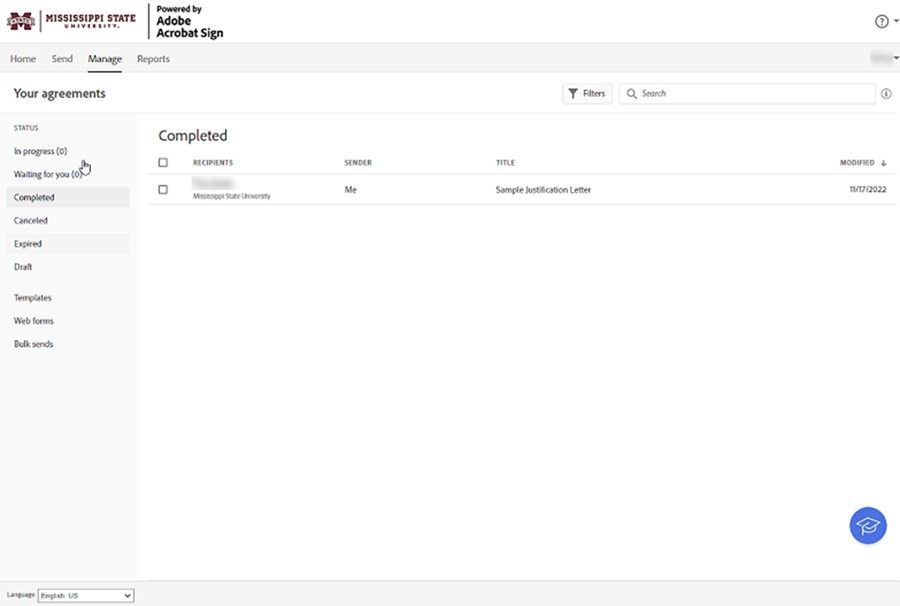
Once the document has been signed, it shows as Completed in Adobe Acrobat Sign.