Filelocker includes a feature for group file sharing. The expiration date and file quota for your account still apply to this feature. Groups could be functional for departments, search committees, and organizations that need to share files and data. Also, Groups are intended only for those internal to MSU.
To create a group in Filelocker, click the Manage Groups button.

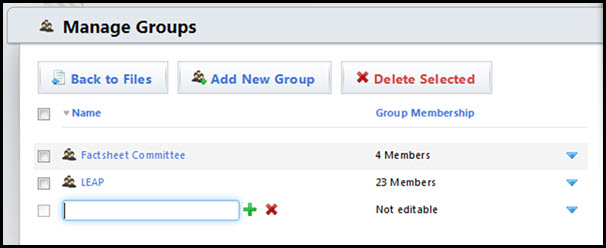
In the Manage Groups section, click Add New Group to set up a new group.

Enter the name of the group, for example, Search Committee, into the Name field and click the “+” sign next to the field.

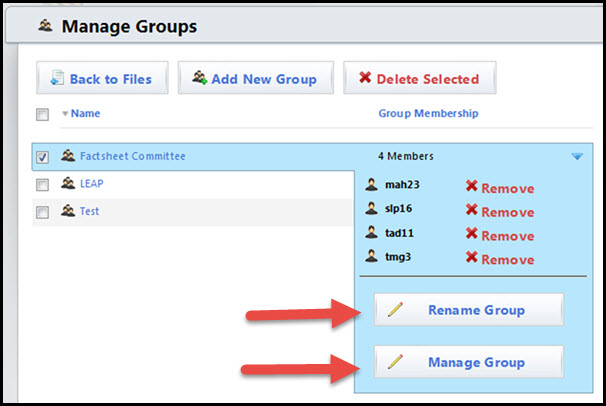
The name of the group appears. Click the blue triangle to Rename Group or Manage Group. Manage Group allows members to be added.

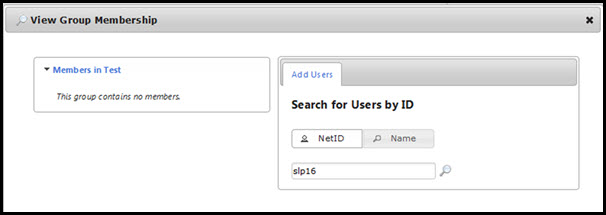
In the View Group Membership window, under the Add Users tab, enter the NetID or name of the person to be added to the group. If the NetID is unknown, select the Name button, enter the person’s name. When the person’s name appears, click the name, then click Add. Do this for all members of the group.

Once all members of the group are added, click the “X” to close the window. If members need to be removed, click X Remove next to the member’s name.
To return to the main Filelocker menu, click Back to Files.