Jump to:
How to limit your calendar permissions for Students, Faculty, and Staff in Outlook for Windows
The default permissions for your calendar is "Can view when I'm busy" which means that other Outlook users will not see details of your appointments but can see that you have an appointment. Explicit permissions for other Outlook users will override default permissions. To change this setting follow these steps.
1. Click File. Click Options. Click Calendar.
2. Under Calendar options, click Free/Busy Options...
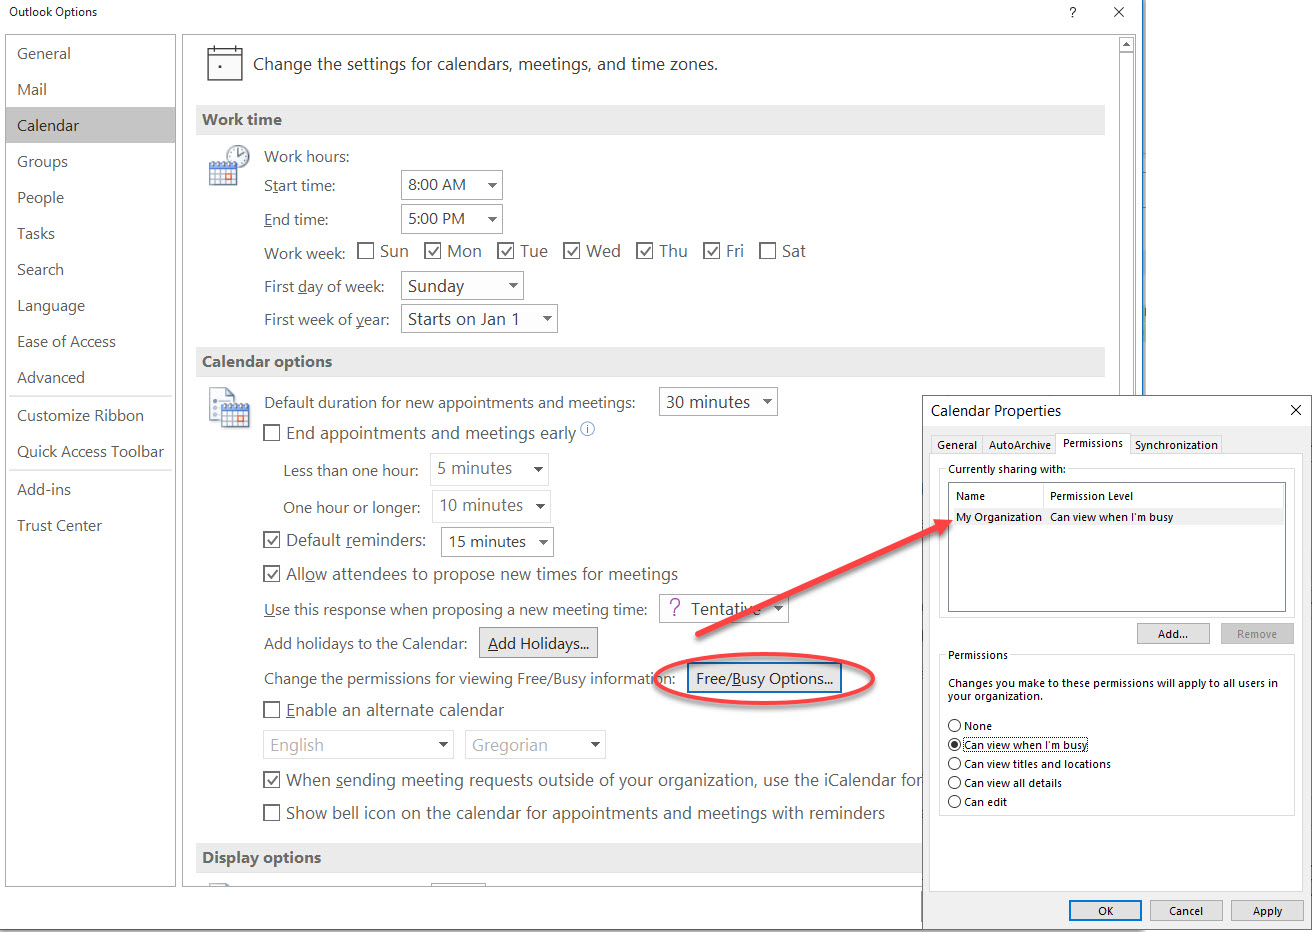
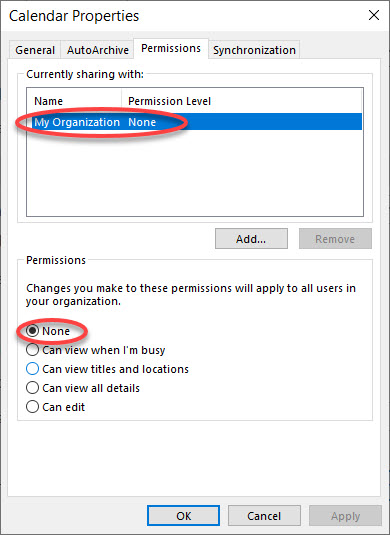
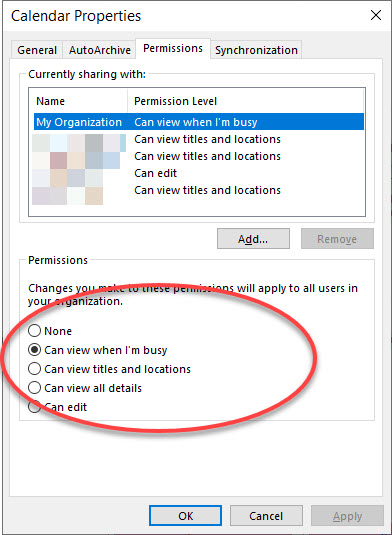
3. Under Permissions, click on My Organization. Under Permissions choose which option you would like. Click Apply. For this example it has been set to None.
Your options are as follows:
- None : No rights whatsoever to your calendar
- Can view when I’m busy: You have an appointment listed, but details cannot be seen
- Can view titles and locations: Your appointments are listed, but only the title and location of the appointment can be seen
- Can view all details: All information about the appointments can be seen
- Can edit: All information can be seen and edited
Permissions can be granted to specific people. For more information please see How to share your calendar.
How to limit your calendar permissions for Students, Faculty, and Staff in Outlook for macOS
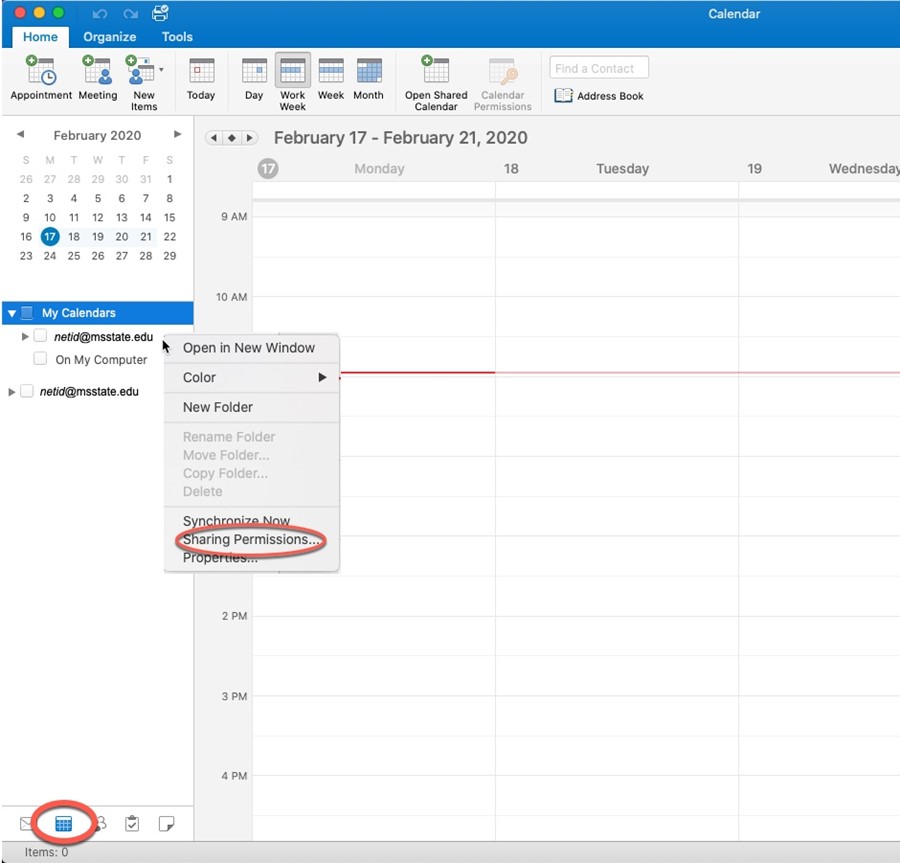
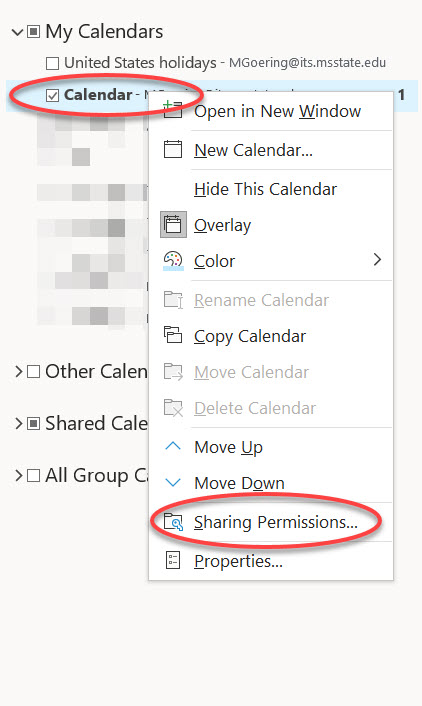
1. Open your Calendar. Right click (Ctrl+ click) on your netid@msstate.edu account under My Calendars. Choose Sharing Permissions.
2. Under Permissions, click on Default. Under Permission Level choose which option you would like. Click OK. For this example it is set to None.
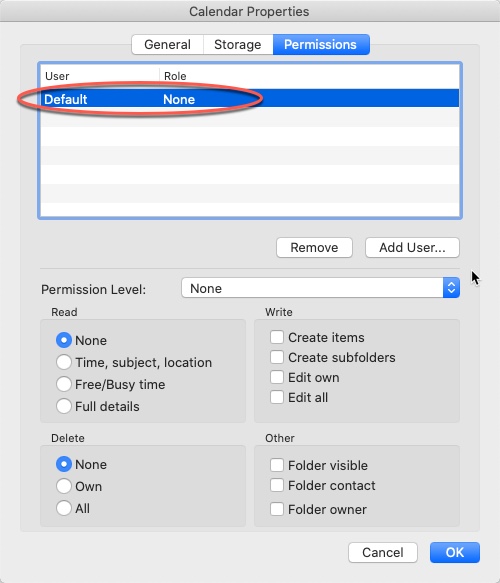
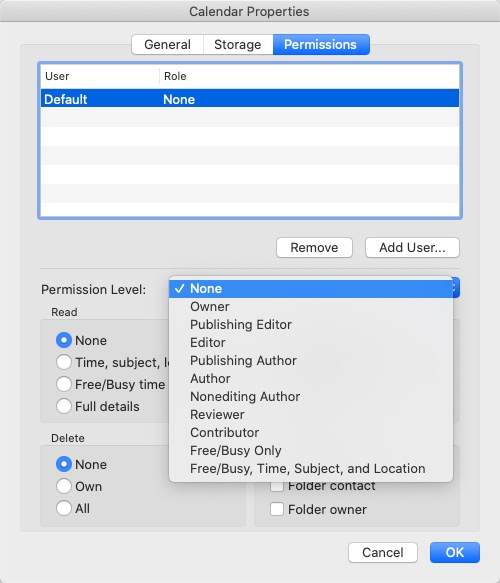
3. Your options are as follows:
- None: No rights whatsoever to your calendar
- Owner: Full details, read & write
- Publishing Editor: Full details, read & write, no access on folders
- Editor: Full details, can create items but cannot create subfolders
- Publishing Author: Full details, can only delete what they created, and cannot edit folders except for those they created.
- Author: Full details, can create and edit their own items
- Nonediting Author: Full details, create items, delete own items, no folder access
- Reviewer: Full details, cannot delete nor create any items including folders
- Contributor: No details, cannot delete items, can create items, no folder access
- Free/Busy Only: Can only see when you are free/busy, no other access
- Free/Busy, Time, Subject, and Location: Can only see when are free/busy, the time, subject, and location
How to Share Your Calendar in Outlook for Windows
1. In Outlook on the Calendar tab, right click on the Calendar with your email address. Click Sharing Permissions.
2. Click Add under Currently sharing with:.
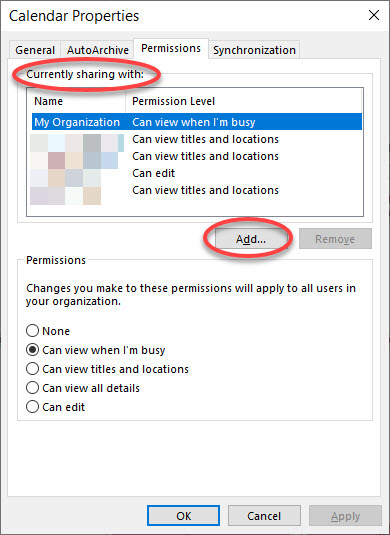
3. Type in the name of the person with whom you would like to share your calendar. Click Add. Click OK.
4. Click on the person’s name under Currently sharing with: and under Permissions choose which permissions you would like them to have.
- None : No rights whatsoever to your calendar
- Can view when I’m busy: You have an appointment listed, but details cannot be seen
- Can view titles and locations: Your appointments are listed, but only the title and location of the appointment can be seen
- Can view all details: All information about the appointments can be seen
- Can edit: All information can be seen and edited
How to Share Your Calendar in Outlook for macOS
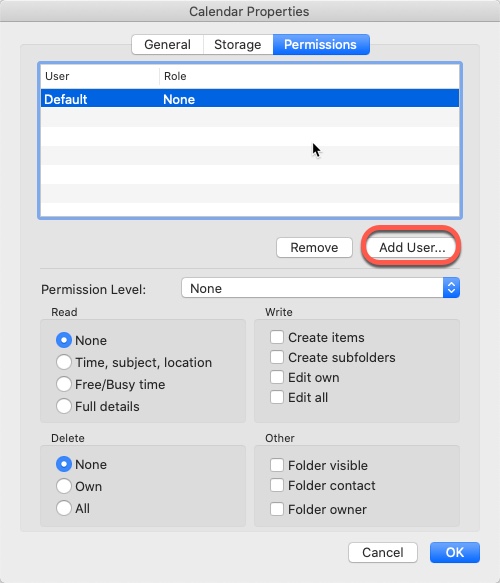
1. To share your calendar, click on Add User.
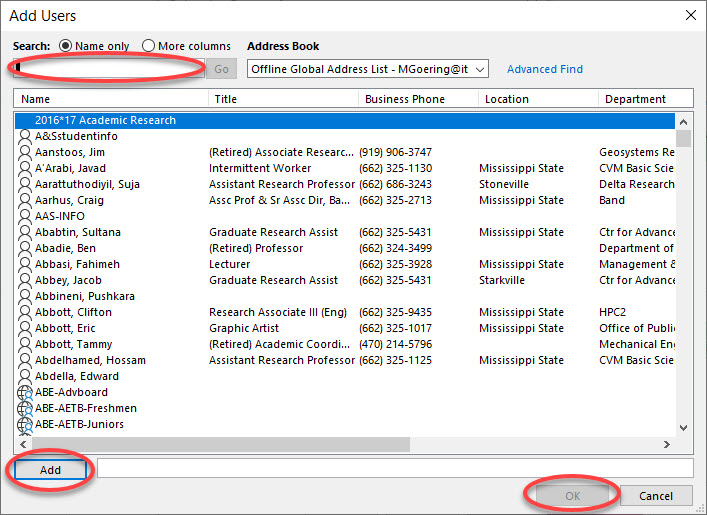
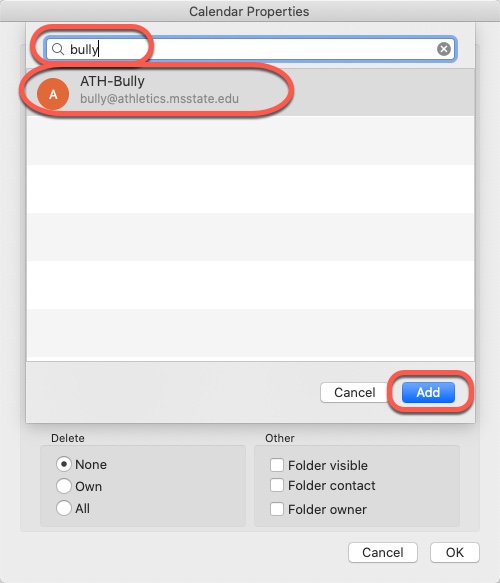
2. Type in the name of the individual with whom you would like to share your calendar. Click on the name and click Add.
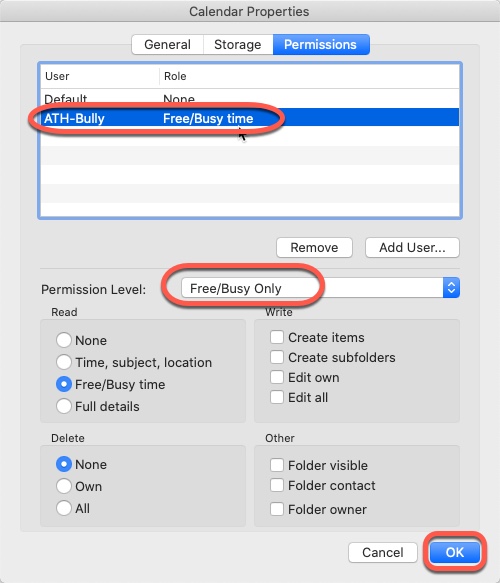
3. Choose the Permission Level. Click OK.
How to Set Different Availability options in Outlook for Windows
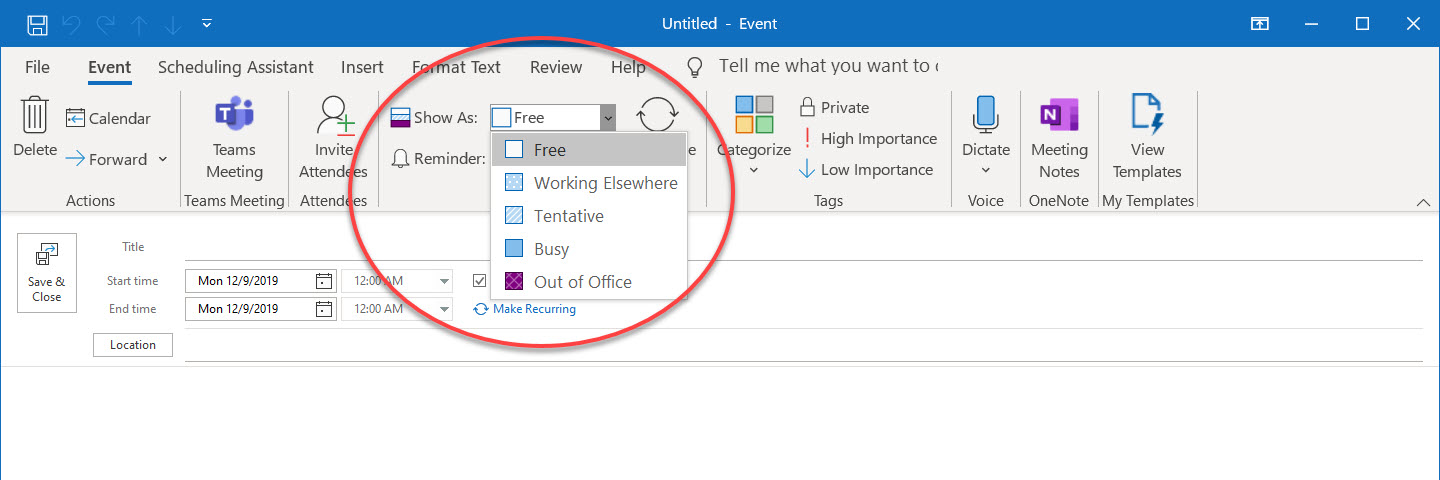
When creating a new calendar appointment you have the options of showing the appointment as the following:
- Free
- Working Elsewhere
- Tentative
- Busy
- Out of Office
This is located in a dropdown menu under the Event tab.
How to Set Different Availability options in Outlook for Mac OS
When creating a new calendar appointment you have the options of showing the appointment as the following:
- Free
- Tentative
- Busy
- Out of Office
This is located as a dropdown item under the Organizer Meeting tab of a new calendar appointment.

How to Add Holidays in Outlook for Windows
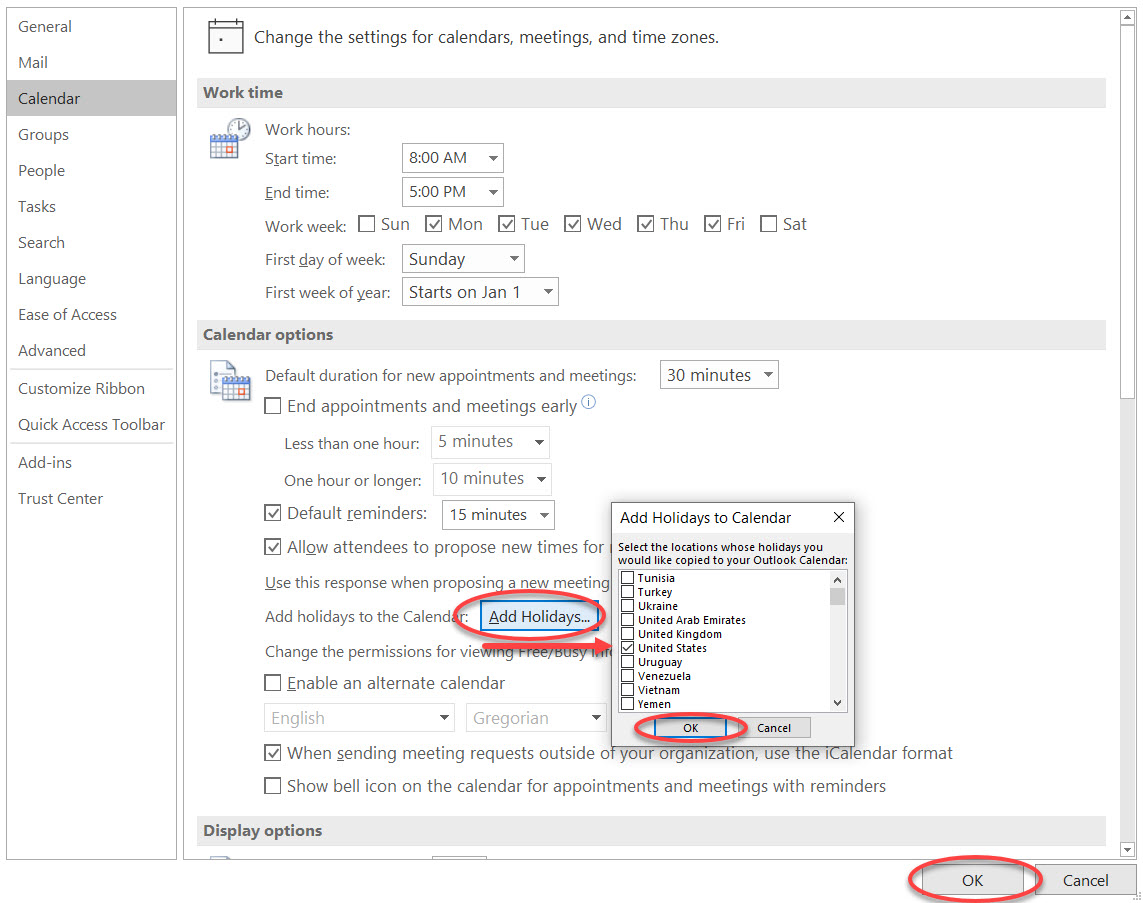
1. Click File. Click Options. Click Calendar.
2. Under Calendar options, click Add Holidays.
3. Check the box for each country whose holidays you want to add to your calendar. Click OK. Click OK.
How to Add Holidays in Outlook for Mac
Outlook for Mac does not currently support adding Holidays to calendars.
However holidays can be added through the web client.
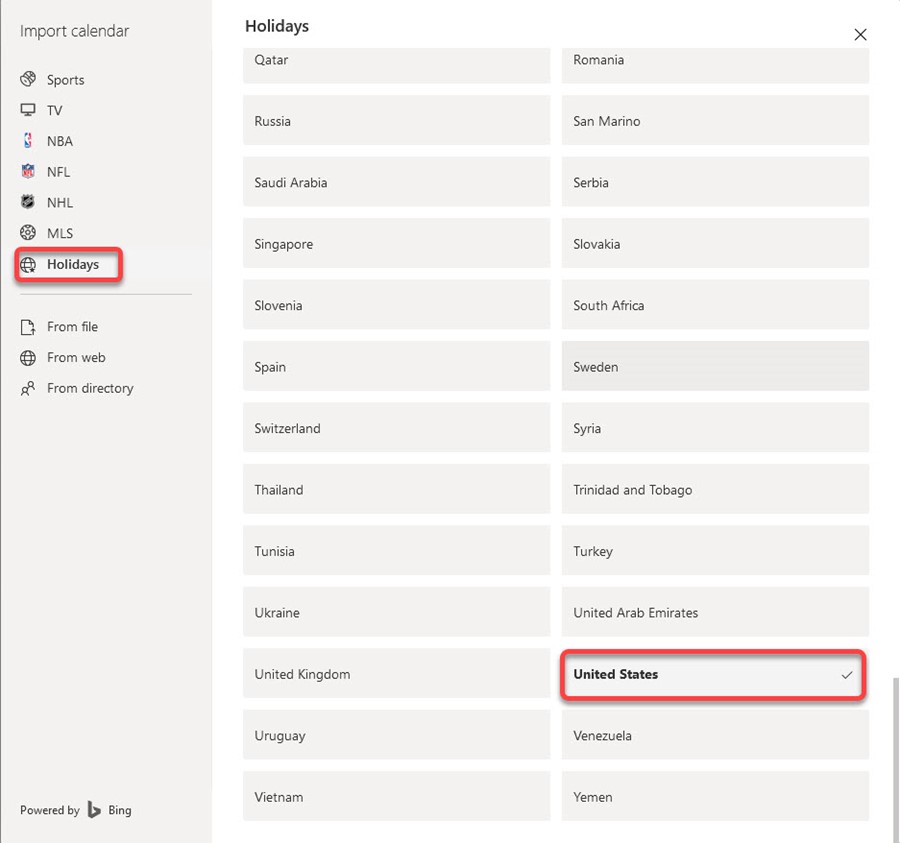
How to Add Holidays in Outlook Web Client
1. Click on the calendar icon located at the bottom of the window.

2. Click on Import Calendar.
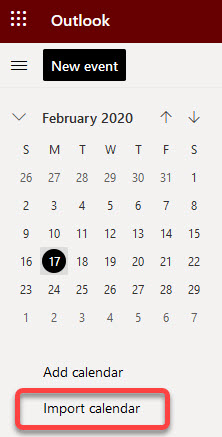
3. Click on the country of your choosing.