Updated June 1, 2023
Sympa Interface: https://lists.msstate.edu
Request a new Mailing List
How to Populate a Mailing List
-
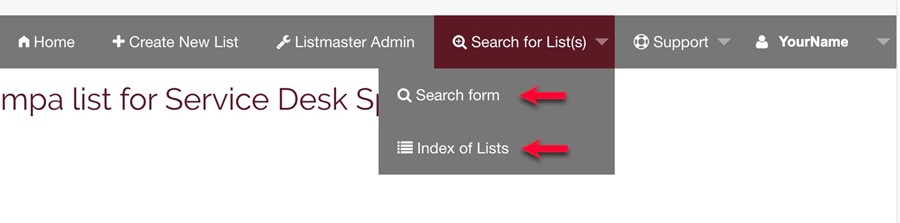
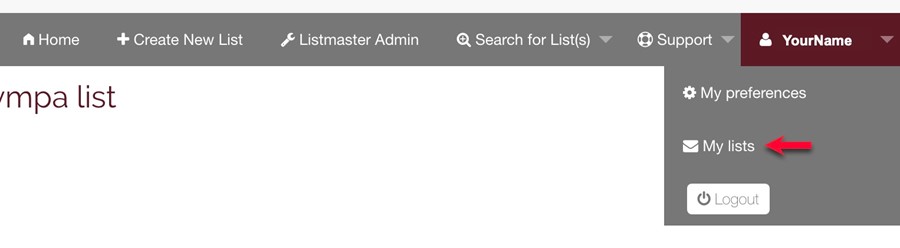
Browse to the Mailing List. You can Search for the list(s) or you can click your login and click My Lists (as seen below).
-
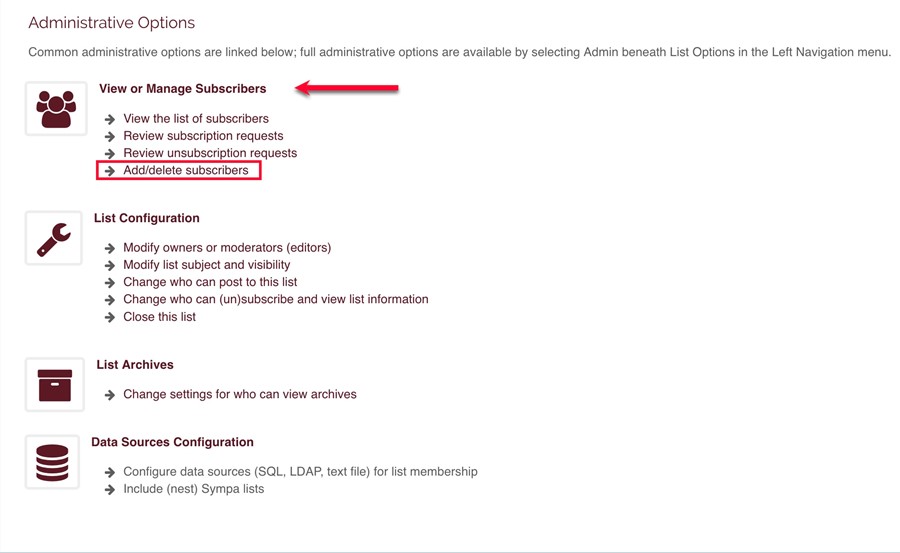
Click Add/delete subscribers.
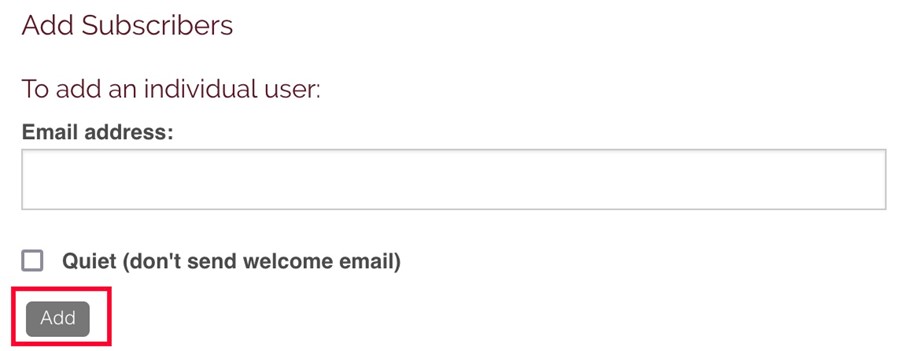
How to add one Subscriber at a time: In the menu on the left side, click Subscribers. You will enter one email address at a time, making sure to click Add after each one. If you want to add their name, you can go to the Subscriber list, click on their email address, and then input their name. Also, if you do not want to send a Welcome email click Quiet. Click Add.
How to add multiple Subscribers manually one at a time: In the menu on the left side, click Subscribers. Scroll the page to the section titled To add multiple users. Click Multiple add.

The next page will have a text box. If you have the list in a text file you can just copy and paste into this box.
Note: Each line is an entry. Make sure to have it in this format:
email_address@domain NameofSubscriber (including Subscriber's name)
email_address@domain (does not include Subscriber's name)
Adding Subscribers from another mailing list
If you want to add Subscribers from another Sympa list, the easiest way is to download a file that contains a list of the Subscribers' email addresses and/or their names. (Dump vs. Dump with names)
-
Open https://lists.msstate.edu and browse to the Sympa list from which you would like to copy the subscribers.
-
In Administrative Options, under View or Manage Subscribers and click Add/delete subscribers.
-
Click on Dump if you only want email addresses. Click on Dump with names if you want the Subscribers' names with the email addresses.

-
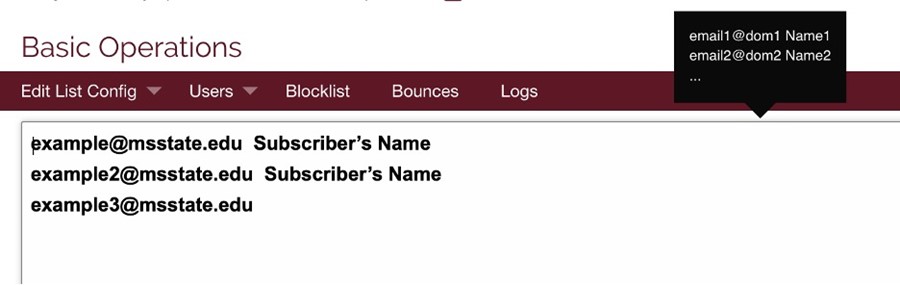
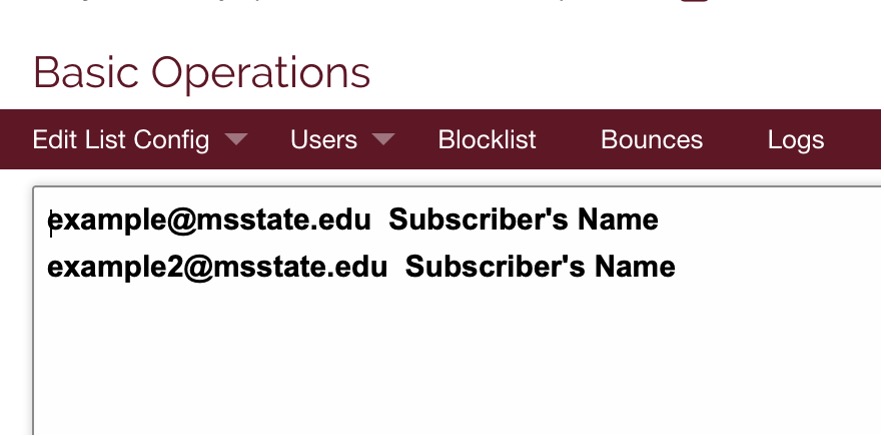
This will download a .txt file that will be named after the mailing list. Once the file is downloaded, open the file. Select all in the list and copy. Open the list that the subscribers will be copied into. Click on Subscribers. Click the button titled Multiple add. 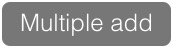 Paste the Email addresses (& names) that you copied into this larger text box.
|
|
|
|
Example for Dump with names
|
Example for Dump without names
|
-
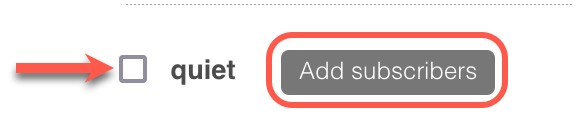
If you do not need the Subscribers to receive a notification that they have been added to the list, simply check the box for quiet at the bottom of the text box and notifications will not be sent out. After pasting the information, click Add subscribers.
Change of Ownership:
Note: Normal Owners are maintained by ITS Service Desk Specialists and System Services only. If you are a Normal Owner (Not a Privileged Owner) and need to make changes to an Owner(s), then please open a Service Request with ITS (servicedesk@msstate.edu). Privileged Owners can change Owners, Moderators & Subscribers. Moderators can maintain Subscribers.
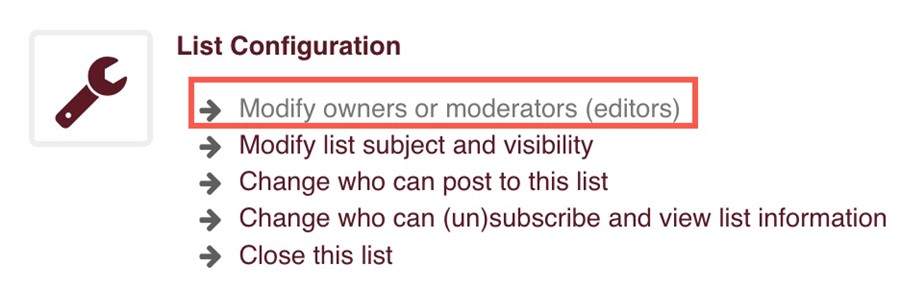
- To modify the owner(s) of a list, first open the mailing list. On the left hand side of the page, click on List Options. On the right hand side, under List Configuration, click Modify owners or moderators.
- Under Users you can select Owners or Moderators.
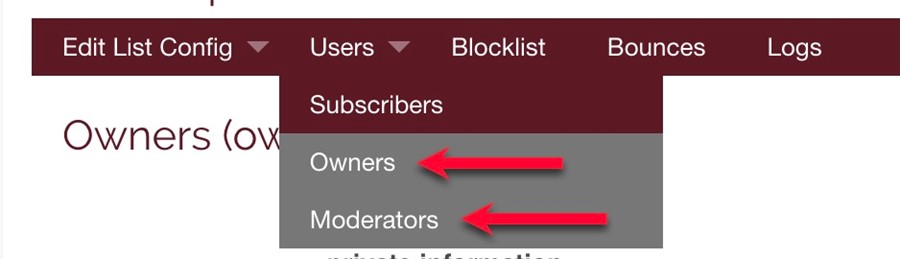
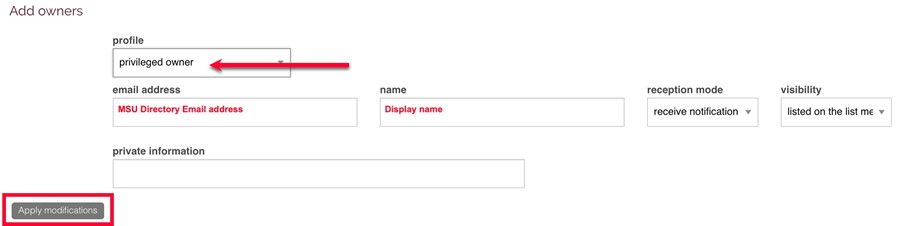
- To add an Owner, at the bottom of the page, under Add owners, type in the MSU Directory email address of the individual. Type in the name of the individual. Click Apply modifications. (Note: you can also find the owners under Basic Operations } click on Users } and click Owners.)
- To remove an Owner, simply check the check box on the right hand side of the Owner's entry and click Apply modifications.

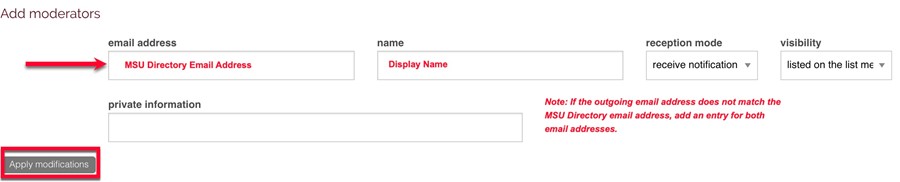
- To add a Moderator: Under Basic Operations, click on Users, and click Moderators. Type in the MSU Directory Email address and the display name. (If the outgoing email address does not match the MSU Directory email address, add an entry for both email addresses.
- To remove a Moderator, simply check the check box on the right hand side of the Moderator's entry and click Apply modifications.
