In Banner, instructors can request to create an email list for their course rosters in order to more easily communicate with their students. Please follow the instructions below to set up class email lists in Banner.
NOTE: Once you've requested the list, it will take overnight or up to 24 hours for the creation process to complete. If you need to modify the list or add additional approved email addresses to send from, these changes will also take overnight to process.
Creating a course email list
1. Log in to myState, then click Banner under the Apps & Services section.
2. Under myBanner for Faculty and Departmental Users, under the Class Management section, click on Class Email Lists.

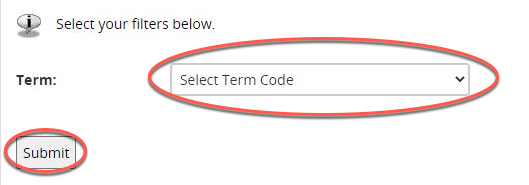
3. Select the Term, then click Submit.
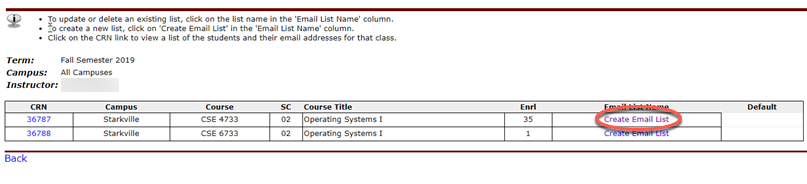
4. Locate the course you'd like to make an email list for, then click Create Email List link to the right of the course.
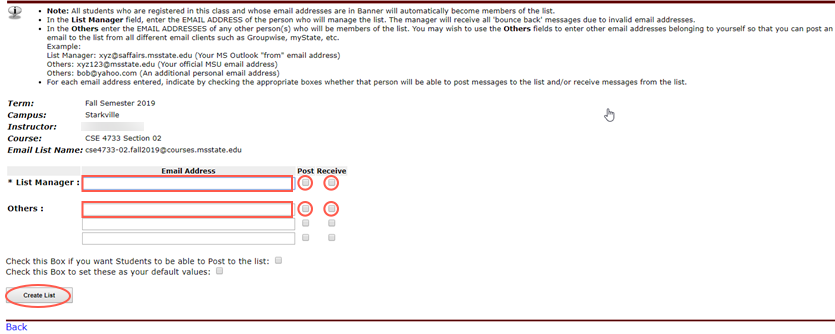
5. Enter in your netid@msstate.edu email address in the List Manager field, if not already present. Click the Post and Receive checkboxes to enable that address to both send emails to the list and receive email from the list. Click Create List.
NOTE: If your primary outgoing email address is not your netid@msstate.edu address, please enter your primary outgoing email address into the Others field and check the Post and Receive boxes. Otherwise, you will receive a rejection message when attempting to email your list.
6. You will receive a confirmation that the mailing list has been created, however, it will take overnight and up to 24 hours before the list will be available to use.
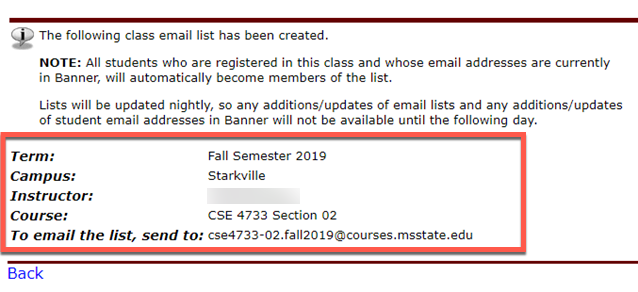
7. Back on the screen containing your list of classes and mailing list names, you should see the email address listed for your class. To make changes to an existing email list such as adding a new approved sender/receiver email address, click on the mailing list address to the right of the course name.
